The Ultimate Guide - How to make a Great WordPress Website in 2021
Table of Contents
Introduction to building your WordPress website
If I can build a WordPress website, anyone can. In this step-by step guide, I’ll show you how to find the right host, set up your site, import a theme, choose and activate your plugins. I’ll cover page builders, SEO plugins, and what you need to do once the website is built.
There are some affiliate links on this page. I only recommend products I would use myself and all opinions expressed here are my own. This page contains affiliate links at no additional cost to you. When you purchase various products or hosting through my links, I may earn a small commission that helps me bring free and useful content to you.
I recommend WordPress because it is the simplest, most powerful, SEO compatible content management system in the world.
With my recommendations, you will never need to write a line of code. You will, however, end up with the most professional, branded website for your business.
There are many gurus on the Internet who will teach you the technical aspects of building a website. That’s good and necessary, but the build has gotten progressively easier with various plugins, page builders, and themes. What counts now as far as Google is concerned, is making the user happy. We make the user happy by providing great content and great design that will keep them on the page. We also must satisfy Google metrics that include:
- Load speed
- Visual stability (annoying, unexpected page movement)
- Page interactivity ( the time from which a user taps a button to the time the browser process the interaction).
What do I need to make a WordPress website
- You will need the best web host for your business
- A domain name
- An SSL certificate
- A theme
- Plugins
- A plan
What is the first step to building a great website?
Don’t start building before you do the groundwork. You are going have to think about your branding before sitting down to create your site. Without an overview of your business goals, you will be wasting time and money. To get step by step instructions of how to brand your website please read Building a branded website.
You will learn:
- How to create a consumer persona so that you know who your target audience is
- How to define your value proposition
- How to create your brand identity
- How to write your story
- How to pick the right voice and tone to communicate to your target audiences
- How to understand color preferences by demographic
- And more, so that you will be ready to hit the ground running once you begin your build
What is the second step to building a great website?
Decide what kind of website you are building. For example:
- Corporate / Business
- E-commerce
- Service
- Creative
- Informational
- Entertainment
- Blog
- Non-profit
- Educational
Next, decide on the purpose of your site:
- Sales / nurturing sales – if sales is the objective, then make the sales process smooth, integrated and secure
- Lead generation – have sign up forms, downloadables, various CTAS that take users through a funnel
- Building your reputation – have great content and publish regularly. Feature testimonials, your business partners, reviews, and your social media
- Describing your expertise – Write great content that answers user questions, FAQ sections, and feature your professional affiliations etc.
- A combination of the above
When it comes to web design, design follows content structure. You must compel the visitor to take action, whether it is signing up for a freebee, purchasing something, booking, or contacting you. But before you start adding CTA’S and other elements, the site’s pages and their purpose need to be decided upon. Generally, you will have:
- A Home Page
- An About Page
- Various Services or Sales pages
- FAQ pages
- A Blog posts page
- Portfolio page
- Contact page
To get a comprehensive overview of how to plan website structure and what to feature on each page, please read How to design your website layout.
What is the next step to building a great website?
In order to get a better understand what making a branded website consists of, please read the pages below before you start
- Choose the best color palette for your website, based on your industry and the demographic you are serving
- Choose the best brand images for your business to help you choose powerful images that harmonize with your brand colors and message
- Choose the best fonts for your website to understand which fonts go together and are most suitable for your business message
Once you have an understanding of those elements, you will be well on your way to tackling the actual build.
Choose the right web host
Let’s get one thing straight, there is no right host. There is just the right host for you and where you are at right now. Since you are a beginner, you will probably want to do things the simplest and least expensive way possible. In order to understand the various types of hosting options, please read Choosing the Right Web Hosting.
Because you are a beginner, you will want the following:
- A simple click and install option
- Free domain name and domain registration
- 1 click SSL installation
- Great support
- An easy to manage dashboard
- Reasonable prices
- Automated backups
I recommend either SiteGround or Bluehost. If you purchase hosting using my referral links, I will get a small commission at no additional cost to you.
Both are endorsed by WordPress. I personally use BlueHost. If you ever want to discover which host your guru actually uses, aside from the ones they recommend, plug their domain into Hosting Checker.
Bluehost and SiteGround will feature three hosting plans under WordPress ( shared ) Hosting. If you choose the two lowest priced Bluehost plans, know that you will need to add a backup plugin like Updraft Plus, a free WordPress plugin or Site Backup Pro, purchased from Bluehost at a low monthly rate. It will be offered when you sign up. You will need to back your site up at regular intervals. You will get various features with each plan, but most importantly:
- A free domain name. This is the name that identifies your website. It functions as your address on the Internet
- 1-click WordPress install
- An SSL certificate – this is a security certificate. It makes your website secure – https, not http. Google will love you for it
Set up your site
I am showing you the Bluehost sign up, but SiteGround will be very similar. The system will prompt you each step of the way. If you think you made a mistake or if you need support, just enter the chat room for help. If you go through my affiliate link, you will get BlueHost’s discount rate of $2.75 a month for the first term.
- Go to the Bluehost WordPress hosting, click Compare Plans Now button
- Select your plan on the pricing page. Blue host is offering three options: WordPress Hosting (for when you are starting out), WP Pro (for high traffic sites) , E-Commerce (high speeds, Woocommerce, secure checkout) Choose the right option for your business.
- If this is your first site, you will probably go with the WordPress Hosting option. You will have a choice of three plans, when you choose this option. If you choose Basic or Plus, you will need a plugin for your backups.
- Sign up now. If you have a domain already, enter it in I have a domain name already. If not, then enter your domain in the new domain area area. Bluehost will let you know automatically if that name is in use already.
You should give some thought to your domain name. You will want a domain name:
- That has a .com extension. People are so used to typing it in that anything else can get confusing
- Don’t use hyphens or weird spellings
- Don’t pick a domain that is too long
Remember:
- Many domains are already taken so come up with a bunch of options
- Keywords in the domain don’t affect ranking
- Branding should be part of your domain strategy. Do some research on your competitors and try for a name that stands out from the pack
5. You will get package information at the very end of the process. You probably don’t need any of those addons at this time. Choose your term on the account plan option, pay, and you’ll be ready to install WordPress.
Install WordPress
- Click install
- Wait until WordPress Installs
Log in to WordPress
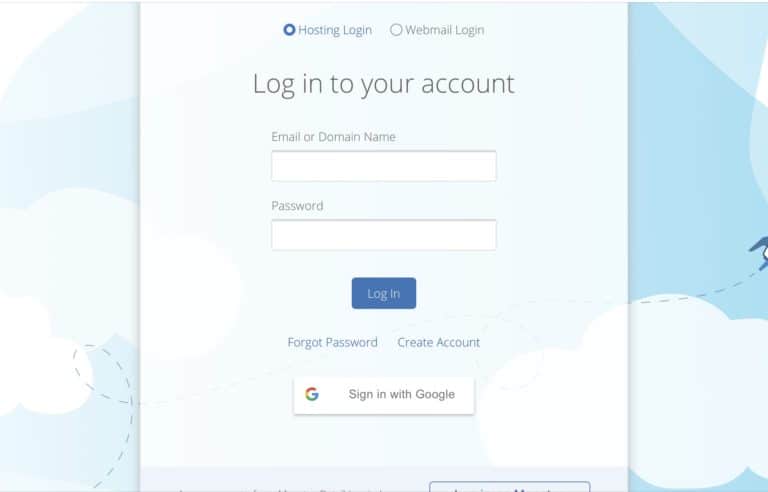
- Go to your login page and login with your user name and password. Write them down, because there is no way to retrieve them. You will have to change them if you forget.
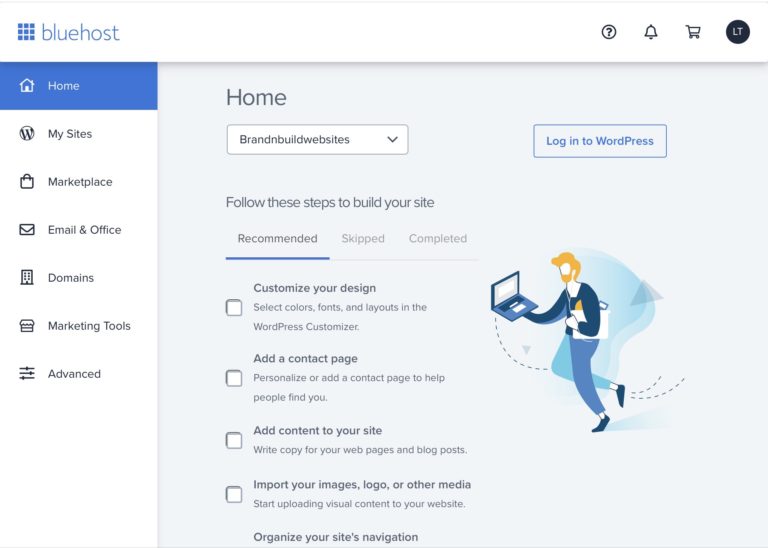
- Click on the Log in to WordPress tab
- You can set up your email later.
Orientation
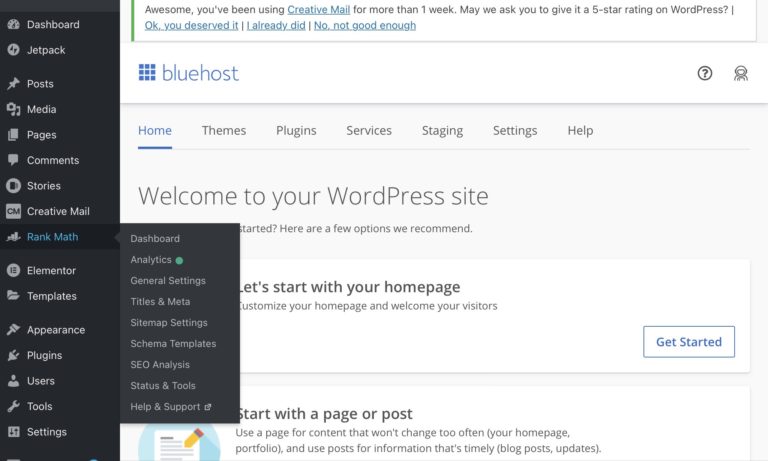
You are now at the developer end of WordPress. This is called a Dashboard. You can expand any of the tabs to see sub menus.
- Posts – click for two options: All Posts ( this is where you will find all of your posts listed), Add New (click to write a new post, you will be redirected to the new post)
- Media – Is where all your images and videos will be housed. You can upload media images by clicking on Media, which will open. You can drag and drop or upload your files. Try to keep your image files on the small side. JPEGS load faster than PNGS. I manually resize my images, so that I am not uploading anything bigger than 1200 x 900. WordPress will automatically resize your image to fit properly in various locations, for example: thumbnail, medium, or large. Later you can use a plugin like WP Rocket or Smush to shrink images, so that your pages load faster.
- Pages – such as Home, About, Contact etc. You will see two options: All Pages and Add New
- Appearance is another important tab. You will be using the Customize option a lot.
- Plugins – is where you can add, update, activate and delete your plugins
Choose and install your theme
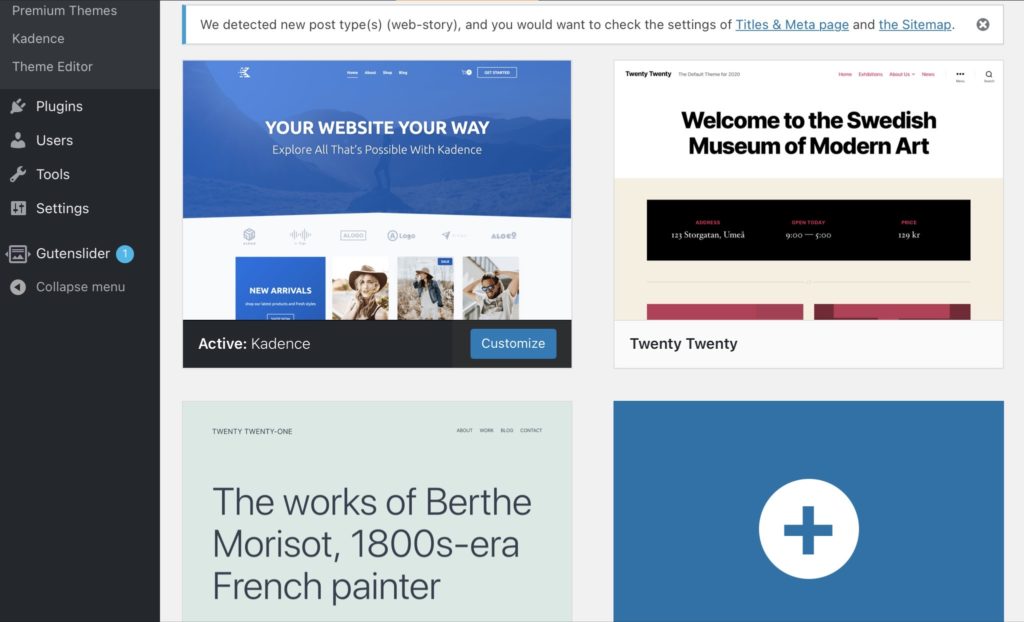
I highly recommend researching your theme during the planning stages. I recommend using a premium theme when you are a newbie. You will probably pay $60 for it, but you will get more features. If you don’t have $60 to spend, use the free version of Kadence or Astra. Please read my Resources page to learn more about themes and reputable marketplaces where you can buy themes.
To install: Go to Your Dashboard, then find Appearance > Themes> Add New.
I use Elementor as my page builder. Theoretically, you can use Elementor with any WordPress theme. However, some themes work better with Elementor than others. Astra is very easy to use and integrates well with Elementor, as does Hestia Pro (buy at Themeisle) Bellvue is recommended for recommended for hotels, B&B’S and vacation rentals. Buwoo Theme is the first premium WooCommerce Theme with Elementor ( buy both at Themeforest).
Delete the other themes. Leave one theme, such as 2021 as your back up theme, should your theme fail..
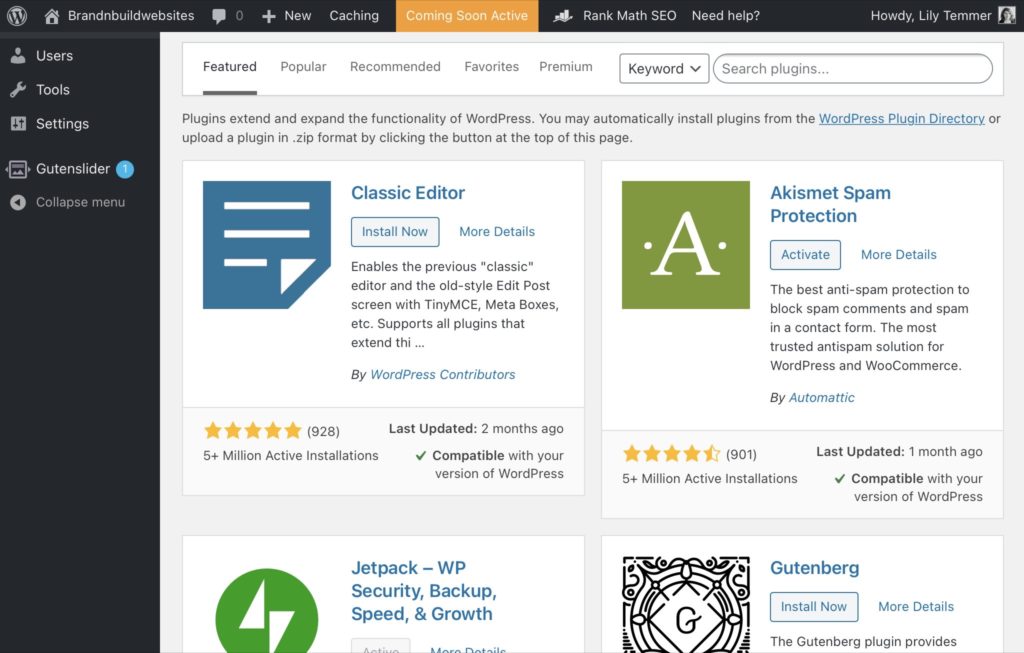
Add your plugins
I recommend:
- Elementor Pro – Page builder
- RankMath or RankMath Pro -SEO plugin
- WP Rocket – caching plugin
To see all my recommendations, see the plugin section on my Resources page.
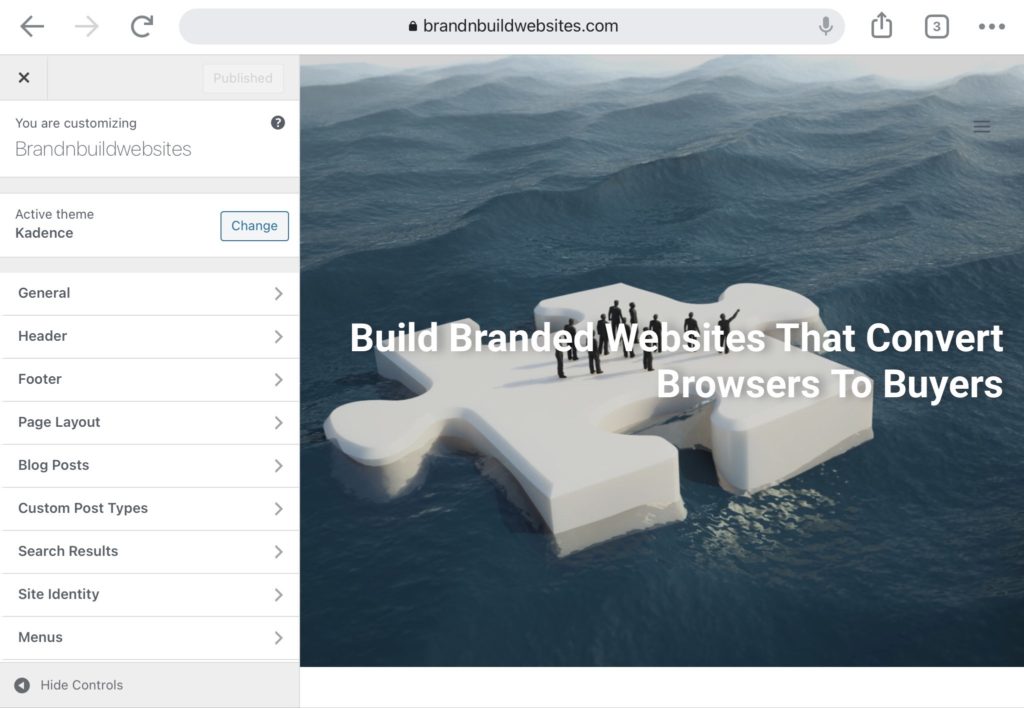
Customize your theme
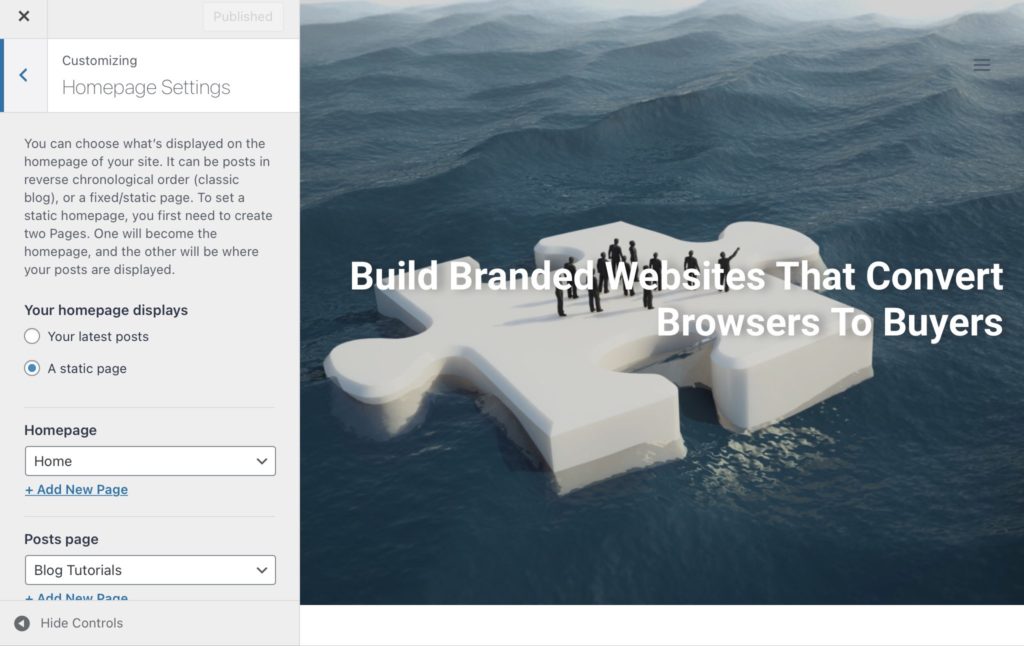
The most important thing to do during this phase is to set up a static home page. You can customize all the other details after you build your pages. Go to Appearance > customize > home page settings
Add pages
These pages will generally be:
- Home page
- About page
- Services / product pages
- Contact
- Blog
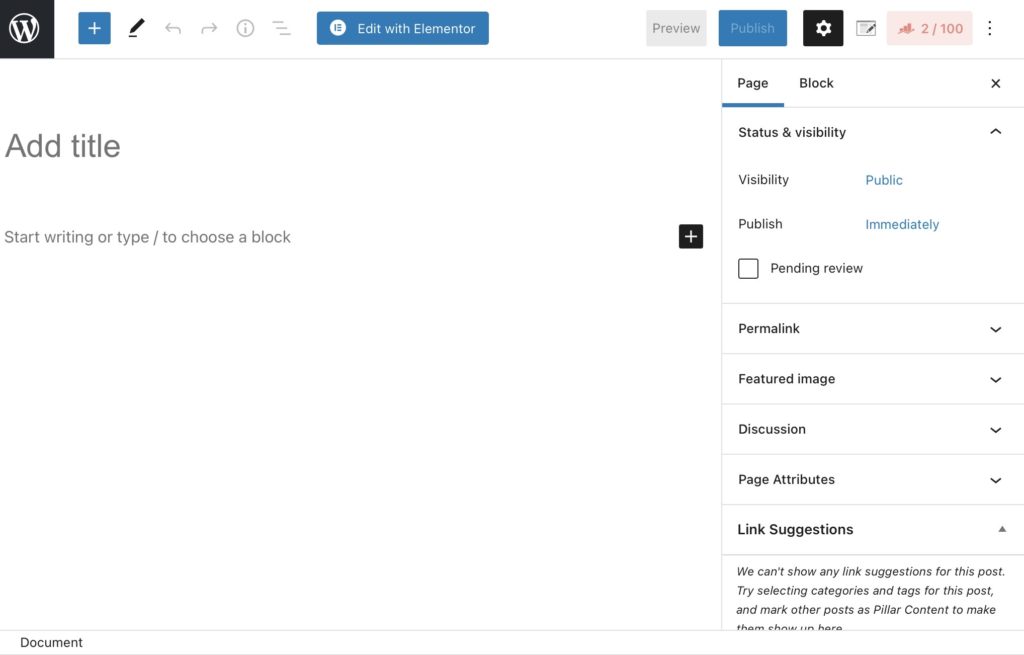
You don’t need to add any content for now. You can title them and then hit the blue button to publish them.
Remember:
Go to All Pages and delete your Hello World Page
Set Up Your Menu of Pages
Once you have published your pages, go back to Appearance> Customize. You will see a plus sign. Add your pages from the right column by clicking. You can arrange them by dragging and dropping.
You can create a submenu by slightly indenting and dropping. Hit the publish button. Your menu should display at the top of your pages. Go back to the developer end to Pages> All Pages, scroll, and open up whichever page you want to work on first. Under the page title, hover your mouse. Edit, Quick Edit, Trash, View, Edit with Elementor will come up. Choose Edit or Edit with Elementor.
Add Content
I use Elementor Pro to build the content on my pages. It is a very easy to use drag and drop page builder with tons of functionality. Elementor also comes with prebuilt page templates and prebuilt sections, which are extremely time saving. I use the header, footer, 404 page and header templates often. I build the rest of my pages freehand, rather than using the entire page template.
- Open your page with Elementor
- Click settings to determine the type of page you would like to build, such as canvas or full width
- Select the structure of the section you are building -see Slide 2
- Pick whichever element you want from the left hand side and drag and drop it in the container. You can also size the containers and make them boxed or full width on your page
- You can also click the folder icon and go to Elementor, Blocks, Pages, or My Templates (you can save any section you created in Elementor as a template to reuse anywhere on your site, or any other site you may build in the future)
There are so many things you can do with Elementor. I will include all the details in a separate post shortly. To learn how to build your content, please read:
How to design your website layout
What should I put on my website home page?
How to design a great website header
Features:
- You can Publish or Save Draft at the bottom of the page
- You should check how your work looks in responsive mode, both on a phone and on a tablet and adjust the various elements if need be
- You can preview the page by clicking on the eye icon
- You can go back to before you messed something up by clicking on the history icon
- You can save the page or any section as a template and reuse it
- You can copy whole sections and paste them
- You can copy styles and paste them to new sections
- You can add motion effects under Advanced tab
- You can integrate your SEO and see it under the SEO tab
- Set global colors and fonts
- Style all your elements using colors, various fonts and sizes, and overlays
- Add all sorts of special effects from motion, to borders, to box shadows and much more
Remember: To get your pages to load fast:
- Buy a good hosting plan
- Use a good caching plugin
- Use a CDN
- Size and compress your images
- Don’t be tempted to over design your pages.
Add a Blog
If you would like to have a blog:
- Go to Pages> Add New
- Add the title Blog or whatever you want your blog to be called to that page
- Go back to Appearance> Customize> Homepage settings > Posts page, then use the dropdown arrow until you see Blog
- Hit publish
- Your theme will have settings under Customize< Blog Posts so that you can style that blog archive page and individual blog posts
Remember: your Blog Page is where your individual posts will reside. You can choose how many posts you want to be seen on that page.
Add content to your blog
- Use Gutenberg to write your blog posts
- Add Gutenberg Addons for more widget options
- Click and pick your elements
- If you haven’t already, add the RankMath plugin for SEO
Read Learn how to blog like a pro – for free
That post along with Rank Math’s prompting will help you create awesome content.
Gutenberg pages load slightly faster than Elementor pages, but all other factors remaining equal, the difference is almost negligible. Elementor creates beautiful pages, is easier to use, and looks better. The trick to getting speed is not to go overboard with design features and to minify your images. With Gutenberg, you will be constrained by the limitations of your theme, something that Elementor can override. Therefore, I recommend using Gutenberg to write posts and Elementor to create pages.

Security
Theoretically, your host should be providing all the security you need. Make certain you are satisfied with the security solutions your host is providing.
To get better security than shared hosting provides:
- Use a CDN (content delivery network) like Cloudflare. Many hosts offer that option with one click. If you want firewall protection , you will need to pay $20 extra to Cloudflare per month.
- To get firewall protection, You can use NinjaFirewall WP edition, which you can get at the add new section of your Plugin area. Use it with Ninja Scanner. If you need malware removal, you will have to upgrade.
- Sucuri is considered to be the best on the market, but it is pricey. The free version does not come with Firewall protection. The paid version includes malware and virus removal.
Final Steps
- Proofread
- Make your site live by hitting the coming soon button found at the very top of your Dashboard
- Go to your RankMath > Sitemap settings and generate your site map which you will submit to Google
- Test your website page speed at Google Page Speed Insights. Google will give you suggestions how to improve
- Verify your site with Google
- Submit your site map to Google
- Keep adding quality content
Above all, go slow and don’t allow yourself to get so frustrated that you will give up. You can make mistakes and fix them easily. Keep going and I guarantee you will get better and better with practice.
Remember to check the Responsive Mode tab to see how your design looks on a smart phone or a tablet each step of the way. Half of your traffic will be coming from people using a mobile device. Additionally, another one of Google’s ranking factors is how well your site works on a mobile device. Therefore having clean design, a legible text, and pressable buttons works every time.

